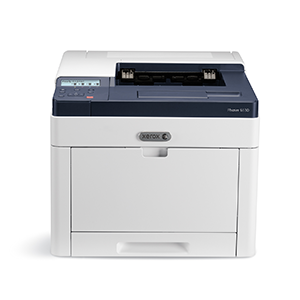
color-laser.math.ucsb.edu - Xerox Phaser 6510DN

macOS 13.x "Ventura"
- Click the Apple menu and select "System Settings".
- Scroll to the bottom of the list in the left column, and select "Printers & Scanners".
- Click the "Add Printer, Scanner, or Fax..." button. The Add Printer dialog appears.
- Click the globe icon in the toolbar.
- In the "Address" box, enter
color-laser.math.ucsb.edu - For protocol, select "AirPrint" (usually the default)
- You can set the "Name" box to whatever makes sense (e.g., "Color Laser (Xerox Phaser)")
- The "Use" box should automatically show "Xerox Phaser 6510".
- Click "Add".
macOS (older versions)
- Click the Apple menu and select "System Preferences..."
- Click "Printers and Scanners"
- If there's a padlock icon in the lower left corner of the window, click it and enter your username and password to unlock the settings.
- Click the + button at the lower left of the printer list.
- Click "Add Printer or Scanner..."
- Click the "IP" or globe icon in the toolbar.
- In the "Address" box, enter
color-laser.math.ucsb.edu - For protocol, select "AirPrint" (usually the default)
- You can set the "Name" box to whatever makes sense (e.g., "Color Laser (Xerox Phaser)") The "Use" box should already be set to "AirPrint"
- Click "Add"
- That's it. You may want to change your default printer to something other than "Last Used," to avoid inadvertently printing black and white jobs to the color printer.
Windows
I have not had time to test a Windows procedure for this printer yet.ChromeOS
- Open "Settings"
- Click "Advanced"
- Click "Print and scan"
- Click "Printers"
- Click "Add printer" (the printer icon with a + superimposed on it)
- Use the following settings:
- Name: Whatever you like -- for example "Color Laser".
- Address:
color-laser.math.ucsb.edu - Protocol: Internet Printing Protocol (IPP)
- Queue:
ipp/print
- Click "Add"
- The first time you print to this printer, you'll need to click "See more" in the print destination list to see it. After that it should show up in the default list.
Linux
Determine your distribution's CUPS version:- Ubuntu or Debian:
apt policy cups - RPM-based distributions:
rpm -qa | grep 'cups'
CUPS 2.2.2 or later
Run the following in a terminal:sudo lpadmin -p color-laser -v ipp://color-laser.math.ucsb.edu/ipp -E -m everywhere
Older CUPS versions
Ubuntu
- Go to http://www.support.xerox.com/support/phaser-6510/ and download the "Xerox Office Standard Driver .DEB x86_64"
- Install the package by double-clicking it. (If this doesn't work, install it with
sudo dpkg -ion the command line.) - Open a terminal and run
sudo xeroxofficeprtmgr - Click the icon with the two downward-pointing triangles (manual install).
- Fill out the fields as follows:
- Queue Name: ColorLaser (can adjust this name to your taste, but no spaces are allowed)
- Printer Model: Xerox Office Standard Driver
- Connection Type: TCP/IP (Workstation to Printer)
- IP/DNS: color-laser.math.ucsb.edu
- Click OK.
CentOS
Follow the instructions above, but use the .RPM driver package.Generic
If you can't install the proprietary driver above, and your CUPS version is earlier than 2.2.2, use LPD or JetDirect printing to color-laser.math.ucsb.edu, along with the CUPS PDF driver.Edit • Attach • Print version • History: r8 < r7 < r6 < r5 • Backlinks • View wiki text • Edit wiki text • More topic actions